Pages

Showing posts with label composition. Show all posts

Sunday, October 27, 2024

Lesson Plan for Week 7


This post is the seventh in a series of beginning-of-the-year lesson plans.  For previous weeks, please see:


Week 7!  I like how each week of teaching is different for me; while I do more or less the same thing during the day and throughout the week in my position, one week to another is quite different.  Week 7 is no exception.  Students are writing their second composition of the year, this time using the notes on the D string (pizzicato) as well as doing their first big playing checkup of the year.  My goal is to get through the directions for the composition quickly to leave enough time to get to all of the students in the small group for their bowing checkup.  Ideally there will be a few minutes at the end to play something together, but that may or may not happen for each group.

Again, the format for this lesson plan is a 30-minute small group, with three to four students in a small group.  The most students I have been able to get through on a playing checkup/composition day is six, but that is really pushing it and doesn't allow me to give each student the individual time I would like to spend conferencing, going through their comments together and checking for understanding.


NEED:

ON THE BOARD:

  • Agenda on screen
  • The five D string notes written on the staff (D, E, F#, G, A), already labeled with finger number (above) and letter name (underneath)

ALSO NEEDED:

  • Have spare folders and Orchestra Expressions books handy in case students forgot theirs
  • Spare instrument for me
  • iPad/phone/camera to scan playing checkup rubric sheets before returning to students (in Notes app)
  • 1-page Google Doc condensed version of this lesson plan (includes lesson plan for full orchestra too)


COMPOSITION #2:

We have been pressing down our fingers on the D string to play different notes, so today we get to write a composition using our new D string notes!  I'll take a volunteer to read the paragraph at the top.

[Student reads]

Thanks [name].  Let's look at my composition, "A Walk Down the D String."  Before playing, let's say the letter names. 

[I play on piano while everyone is saying the letter names]

Let's play "A Walk Down the D String."  Playing position, all four fingers on the D string, L shape, plant the thumb.  Ready, play.

[Play while I'm saying letter names/finger numbers]

Let's set instruments gently in cases, grab your pencil, and let's go through the check list together.

As usual, we'll need a title.  I named my piece "A Walk Down the D String"; you can name your piece whatever you like.  Next, we need the name of the composer, so go ahead and write your name on the "by" line.  

We need a treble clef at the beginning so we know it's violin music--that's been done for us already!  We can check off "treble clef."

Next, we need a time signature after the treble clef so we know how many beats go in each measure.  Your choices are 3 beats or 4 beats in a measure.  I chose 4 beats in a measure for my composition, so I wrote the 4/4 time signature after the treble clef.  If you'd rather have 3 beats in a measure, write the 3/4 time signature after the treble clef.

We need bar lines between each measure--that's been done for us, so we can check off "bar lines."

At the end we need a...double bar line.  That's been done for us too, so you can check that off.

For rhythms, we'll use quarter notes and quarter rests, which each count as one beat.

Then, you can use any of the D string notes, so D, E, F#, G, A.

When we draw the notes, we start with the note head, the oval part, color it in, and then all these notes get up-stems, up to the right.  [Draw sample note next to the labeled D string notes] If you want to include a rest, you can draw a zig-zag or lightning bolt shape.

Any questions before we begin composing?

We also have our bowing checkup to do today too.  Who would like to play first?  Who would like to play second?  Third?  [Get comment slips in order of student volunteers; if there's not a volunteer, sometimes I do Rock, Paper, Scissors, with winner going first]

[If students want to try out different sounds on their instrument to get ideas of what to write, that's fine.  If students are done composing while I'm still listening to playing checkups, they can play the pieces on p. 16--all pizz.  If they finish those, then they can move on to p. 17, but those are arco so it's harder to hear whoever is doing their playing checkup.  In-between checkups, while the next person is getting their bow and getting set up, I quickly glance at other students' compositions and help get them on track if they need help with number of beats in a measure or how to draw the notes or that you only need the sharp sign in front of the first F# in a measure, etc.]

[For each student doing the bowing checkup, I open their book to p. 13 while they're grabbing their bow and instrument]

We're going to play "G String Level" today.  Think about how you're sitting in your chair and holding your instrument and bow, and whenever you're ready you can begin.

[Student plays; I'm circling numbers and jotting comments for Proper Playing Position and Bow Hold, maybe comments for Bowing]

Now we're going to play "Cross Bows."  Remember we play the first half two times and the second half two times. [Pointing in the music how the roadmap works]

[Circle numbers and finish jotting comments for the remaining categories]

Thanks, Name.  I'm just finishing scribbling...  Okay, let's go through my picky comments together.

[Walk through each category together, starting with a positive comment.  Have student find bow hold again and make adjustments as needed.  Try out bowing the open strings with the comments/suggestions I wrote]

Any questions for me?  Okay, thanks for playing and happy composing!

[Once I'm done with everyone, I set all their comment sheets on my desk and use my iPad to scan them using the Notes app.  I'll return the comment sheets to each student so they can take them home.  Then, I'll see how students are doing with their composition or collect those that are finished and guide students to practice the piece on p. 16 and then 17 when they're ready for something else to do.  If everyone is done with some time to spare, we will play some of the bow lift pieces on p. 17 together]

It is time to start packing up.  For practicing this week, we have the pieces on p. 14-17 in the book, our green sheet with the D string notes, and then Serenata.  I'll get your pieces typed up this week so we can play everyone's next time.


---


Before the following week, I write comments on compositions (which may just mean starring each of the check boxes, starring the composition itself, and correcting errors in notation with a colored pencil), type them up and put them in a Google Doc by instrument, print out one copy on colored paper to post on the STAR musician wall, and record grades for Rhythm and Music Literacy.  For the bowing checkups, I have the scans of the paper slips to use when recording grades into the grade book.  I also need to make copies of the note-reading pre-test, Version A.


Monday, September 30, 2024

Lesson Plan for Week 4


This post is the fourth in a series of beginning-of-the-year lesson plans.  For previous weeks, please see:


It's Week 4!  Again, a bit of context.  I see students for 30-minute small groups once a week and full orchestra for 30 minutes once a week.  At this point, it is the end of September/beginning of October, and my elementary schools have a winter band/orchestra/choir concert coming up the first or second week of December.  Ideally, I would like to spend more time on technique and review and refining, but realistically, I know all the skills we need to get to by the winter concert and then January's String Fest and how little time we have before then, so we press ahead.  Although I would like everyone's set-up to look great from the beginning (and some do!), I have to trust that, even if students aren't all there yet, we will do enough review as we go on that they will keep getting more and more.  I also know that many students have tried playing with the bow at home even though we haven't gotten there yet at school, so I might as well show students sooner rather than later before everyone teaches themselves bad habits at home :)

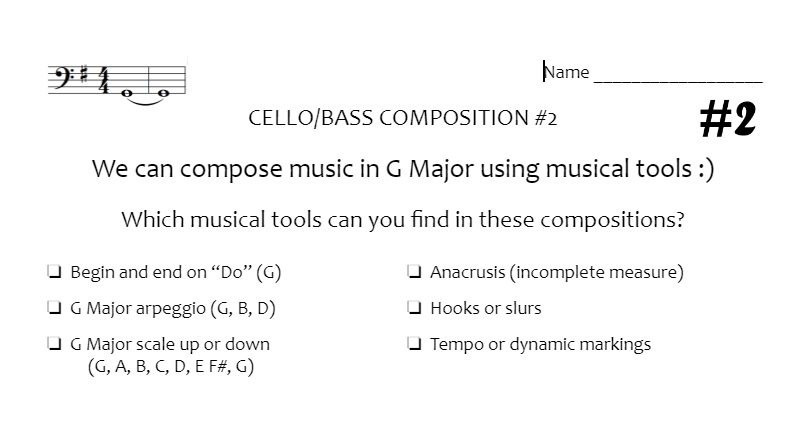
In preparation for Week 4, I have typed up everyone's compositions onto a Google Doc (see Week 3's post for templates) and shared the link for each instrument's document on our Canvas page.  I've printed out one copy of everyone's compositions on colored paper and taped those up on our STAR Musician wall too.  I have also created a "Green Sheet" that includes a reference of the D string notes as well as three melodies typed using Alpha notation.  One is always the melody of "Barcarolle" that I have been playing, and then the other two preview String Fest pieces that students will be learning later in the semester.  Ideally, I'd like to use the book to start with the D string notes (which I have in past years), but I also have future concert repertoire in mind and have started using this green sheet the first week with fingers instead (we'll get to the book the next week).

Again for this lesson plan's sample script, I will assume this is a violin group.  This lesson plan is for a 30-minute small group, designed for groups of about 3-4 students all on the same instrument.


ON THE BOARD:


ON MUSIC STANDS:


ALSO NEEDED:

  • Pile of student compositions from last week, in order of the order I will be seeing students that week
  • Grade/attendance sheet ready to write down marks for Three-Point Shot
  • Have spare folders and Orchestra Expressions books handy in case students forgot theirs
    • "Green sheet"--this sample has "Au Clair de la Lune," "Bile 'em Cabbage Down," and "Barcarolle"
  • CD player with Orchestra Expressions CD
  • Spare instrument for me
  • 1-page Google Doc condensed version of this lesson plan (includes lesson plan for full orchestra too)


AS STUDENTS ARE ENTERING:

Welcome!  Cases on the left-hand side, little end in the back.


UNPACKING:

Instruments out, sponge or shoulder pad on.  [While students are getting settled in, I am opening books to p. 10]


p. 10--THREE POINT SHOT:

We have been reading and plucking the open strings for a couple weeks now, so we should be pretty comfortable reading and playing the pieces on p. 10.  Today, we are going to take turns playing "Three Point Shot" so I can see that we are able to find playing position, sitting tall in the chair with feet flat on the floor and jawbone on the chin rest, and so I can see that we are comfortable reading and plucking the different notes.  Who would like to play first?

[I write down a quick mark on my grade sheet for body format and for music literacy.  My district uses 4, 3, 2--4=exceeds expectations, 3=meets expectations, 2=basic]

    [4= with confidence
    3= with hesitation or corrected notes on own
    2= with assistance]

Thanks [name].  Who would like to play next?  [Name], you look ready to go. [I give brief individual feedback as needed but the pace moving]

[Once everyone has played] Now let's play it everyone together, with the repeat and with the recording.

[CD track 11]

[I finish jotting down numbers if needed]


LEFT-HAND PLAYING POSITION/D STRING NOTES

Rest position.  Last week we found our new left-hand playing position.  In rest position, let's do our left arm swing.  On one of these swings, come all the way up to look at the palm.  Notice the wrist is naturally straight and the fingers are naturally curvy. 

Playing position.  Left hand underneath, way up high, jawbone on chin rest.  Now, instead of making an L shape, let the right hand hang on to whatever is comfortable for you so that the left arm can do an arm swing.  Let's do another left arm swing.  Notice wrist is straight, fingers are curvy.

At the base of our pointer finger is a knobby bone.  We're going to balance the neck of the violin on that knobby bone, thumb touches lightly across (by the red tape).  This is left-hand playing position. [Make some individual adjustments, as needed]

Great.  Rest position.

Now, when we've been plucking the open string, the whole string vibrates, from the nut to the bridge.  Today, we're going to press fingers down on the string to get different notes.  When we press fingers down, now a shorter length of string is vibrating, from the finger to the bridge.  [I'm demonstrating]  Do you think we'll get a higher or lower note when we press down our fingers?

[Take some guesses, then pluck the open D string, followed by all 4 fingers down to make A]  Was that higher or lower?  Right, higher sounding.  Shorter, smaller things make higher sounds.  Just like the violin is the smallest of the string instruments and has the highest pitched open strings while the bass is the biggest of the string instruments and has the lowest sounding strings.

Our fingers have numbers.  The thumb does not get a number.  Pointer is 1, middle is 2, ring is 3, pinkie is 4 [wiggle corresponding fingers]

Let's go back to playing position.  Left arm swing, look at the palm, notice wrist is straight, fingers are curvy.  Balance the neck of the violin on the base of the knobby pointer finger bone, thumb lightly across, by the red tape.

Right hand, L shape, plant the thumb.  Pluck open D, no fingers.  Now, we're going to add first finger, pointer finger, on the D string to cover the red tape.  Give that a pluck.  This is called "E," not open E, but E on the D string. [I'm helping getting the right finger on the right tape and pressed down enough to get a clear sound]

I did not give you a tape for the second finger.  There's going to be a space between 1 and 2, so 2nd finger falls just under the black tape.  Press down the 2nd finger on the D string, just behind the black tape and give that a pluck.  2nd finger is called "F#."

Third finger is best friends with 2.  Set 3rd finger, ring finger, on the black tape, on the D string, right next to the second finger.  3rd finger makes "G."  Not open G, but high G.

Stretch 4th finger, pinkie, all the way up to the blue tape on the D string.  4th finger makes "A."  It sounds the same as open A--why don't you try it out and compare?  4 on D and open A.  Take all the fingers off the string for open A.  Press all the way down to the fingerboard for a clear sound.

[As much as I'd like to talk about "tabletop" fingers, I find that I don't on this day, though as I'm helping students, I do make sure fingers are curved.  If students have long fingernails, I will say individually to that student, "Oh, this will be easier to do once you trim your fingernails" and show them what we're trying to do with the fingers on their tips.  I'm also taking out the "Green Sheet" from folders]

What we just played sounds like "Do, Re, Mi, Fa, Sol."  On the green sheet is a handy reference off all the notes we just played and what they look like on the staff.  Notice that as the notes get higher on the staff, we add a finger.

Let's try ______ (one of the pieces on the green sheet).  First note is....which is how many fingers on the D string?  Good, next note is... [walk through the line giving no thought to rhythm, just getting the fingers down and plucking]  You are ready to try all of these at home this week.

Keeping the sponge or shoulder rest on, set the instrument in its case for a bit.

[For cello/bass, I talk about forming a "C" shape in the left hand, like they are about to pick up a water bottle, fingers open wide, thumb touching lightly in the back across from red tape for cello (2nd finger tape), thumb pointed to the side--not up, left elbow up.  Basses shift already--1 and 4 in 1st position are red tapes; 1 and 4 in 3rd position are black tapes; thumb across from middle finger]


ROSIN:

Let's take the bow out of the case.  The first thing we do is...tighten the bow.  Righty-tighty, clockwise.  You'll notice the stick and hair are getting farther apart.  Keep tightening until you can fit about a pinkie or pencil between the stick and the hair.

In your case you have some rosin.  Go ahead and take the rosin out of your case.  It might be in a little pocket in your case.  Take it out of its packaging.  Rosin is made out of hardened tree sap.  We need it in order to get sound with the bow in a moment.  To rosin the bow, one hand holds the frog of the bow, thumb covers the little metal part, so we're not making a bow hold right now, we're just covering the little metal part so that when we rosin the bow, we run into our thumb down by the frog rather than the rosin running into the metal and possibly chipping the rosin.

We rub the rosin on the bow hair [I'm demonstrating while students follow my lead].  What's happening is little bits of rosin dust are sticking to the hairs of the bow and putting little bumps of rosin dust on the bow, even though we can't see it.  Then, when we play with the bow in a moment, the bumps of rosin dust pull the string of the instrument and make it vibrate.  Without the rosin, we wouldn't get any sound when we play.  We don't need to rosin our bow every day; about once every-other week or so is fine.  Be careful not to drop your rosin because it can break; it can shatter [show a broken rosin].  Okay, that should be good.  Rosin goes back in the packaging, and set it gently back in the case.


BOWING:

Find your bow hold.  Shake, flop, back of hand in toward nose.  Pinkie on its tip, middle fingers hug the frog, little space for pointer, thumb is bent.

Now, with your left hand, can you pick up your instrument by its neck and find rest position?  Great.

In a moment, we are going to go into playing position.  In a moment, we are going to set the bow near the frog, on the A string, between the bridge and the end of the fingerboard.  Then, in a moment, we are going to pull the bow down and up [I'm demonstrating each step].  Okay, let's go up into playing position.  Set the bow near the frog on the A string, between the bridge and the end of the fingerboard.  Play down, up, down up. [I'm going around and helping to pull bows parallel to the bridge with elbows opening/closing for a straight bow]

Raise the elbow a little bit to find the D string level and play open D, down, up, down up.

Raise the elbow even more for the G string.

Now lower the elbow a lot to find the E string.

[I'm opening books to p. 13]

Great.  Rest position, relax a bit.  Let's look at "A String Level."  I see the word arco which tells us to play with...the bow.  Above the first note I see what looks like a staple.  This is called a...down-bow, where we start from the frog and pull the bow down.  And after it is the V-shape, which is called an...up-bow.

[I have the symbols for down-bow and up-bow on the board and draw little arrows on their ends to show how the arrows on the down-bow point down and the arrows on the up-bow point up]

Okay, let's play "A String Level."  Find the bow hold in the right hand.  Now playing position.  Set the bow near the frog on the A string, between the bridge and the end of the fingerboard.  Ready, play.  "Down, up, down, up, rest rest rest rest, down, up rest rest, down, up, rest repeat" [No CD, I'm walking around helping each student bow for a measure or two, saying the bow directions]

You are ready to play all of p. 13 at home this week.

We had tightened the bow before, so now we need to...loosen.  Lefty-loosy, counter-clockwise.  You'll notice the stick and hair are getting closer together.  Keep loosening until the stick and hair are just about touching.  You might see some individual hairs start to separate.  

Holding on to the frog, gently slide the tip of the bow back in the case, then turn the knob or dial to hold the bow in place.


COMPOSITIONS:

[I return compositions]

Here are your compositions from last week.  Congratulations again on writing your first composition for the violin!  Do you know how I got to this page on Canvas?  Great, now I'm going to scroll down a bit, and there's the link for our violin compositions.  I'm going to click on the link, and here are all of our violin compositions. [I scroll through the entire document so students can skim the titles of each and find their name]  I think we have just enough time that you can play one composition on your own before we pack up [I try to find the compositions written by the students who are there in that small group so they can try their own or someone else in their small group]


PACKING UP:

Okay, now it's time to pack up.  Sponge or shoulder pad off, instrument flat in its case.  Let's go over the practice assignment.


PRACTICE ASSIGNMENT:

This week you're ready to be playing p. 10, 11, 13, and 14 in the book.  10 we've been doing, 11 is with the bow and the tube, 13 we just started with the bow, an 14 uses the left hand fingers.

We have the green sheet where we're pressing down the fingers on the D string to play the different notes.  You're ready to play all of those at home.

Then, we have p. 2 of the white packet, and you saw where you can find the link to everyone's violin compositions on our Canvas page.  Enjoy trying out everyone's compositions at home this week!

Again, on Canvas, there are bonus videos that go through everything that we did today, so if you want a refresher on anything, click here and that will take you to the video you can watch and play along with at home.

Let's check the schedule for when I'll see you next.

Cases and folders can go back on the racks.  See you at the end of the day when you come to pick up your instrument!  


--


The link to the condensed lesson plan also includes the lesson plan for full orchestra this week, our second full orchestra.  We do NOT use bows in full orchestra yet; students are not yet independent enough to try this out in the full orchestra setting.  Instead, we play p. 8 and 10 in the book and try out the open string pizz. harmony parts on p. 2 of the Orchestra Expressions Supplement Packet that were on last week's practice assignment.  These should be very doable even if students didn't practice those at home yet as they were supposed to :)


Wednesday, September 25, 2024

Lesson Plan for Week 3


This post is the third in a series of beginning-of-the-year lesson plans.  For previous weeks, please see:


Week 3!  Students keep asking "When are we using the bow?"  "Are we using the bow today?"  And my answer is ambiguous--"We're getting there" or "We're getting close, aren't we."  Or, "Look on the agenda on the screen to see what we're doing today."  In this third week, students are writing their own composition using the open strings.  We review the bow hold and add bowing with tubes (toilet paper tubes).  While the only piece students pluck this day is my sample composition (and perhaps their own), this is also their first week of full orchestra, and we play everything on p. 8 and 10 in Orchestra Expressions as well as much of p. 1 of the Orchestra Expressions Supplement packet, so I feel it balances out.

After students turn in their compositions, I will type them up over the next week, saved as Google Docs, so students can play everyone else's the following week.

Again for this lesson plan's script, I will assume this is a violin group.  For the other instruments, just substitute out the different sayings for the open string or instructions for how to draw the different open strings on the staff.  This lesson plan is for a 30-minute small group, designed for groups of about 3-4 students all on the same instrument.


ON THE BOARD:


ON MUSIC STANDS:


ALSO NEEDED:

  • Have spare folders and Orchestra Expressions books handy in case students forgot theirs
    • Composition #1 worksheet (already in folders if prepped by semester--but have extras ready for students who forgot theirs or the rare student who already discovered it in their folder and already wrote a composition on their own)
  • Pencils for students (already in folders attached with yarn)
  • Basket of toilet paper tubes
  • Dry erase marker/whiteboard
  • CD player with Orchestra Expressions CD
  • Camera/cell phone to take a few pictures of a few groups
  • Spare instrument for me
  • 1-page Google Doc condensed version of this lesson plan (includes lesson plan for first full orchestra rehearsal too)


AS STUDENTS ARE ENTERING:

Welcome!  Go ahead and grab your case off the rack.  Cases go on the left-hand side of the chair with the little end in the back.


UNPACKING:

Pull the handle in towards you to put the case flat on the floor.  Unzip or unlatch the case to open the top of the case.  Take the violin out of the case by holding on to the neck.  Sponge or shoulder pad goes on, then find rest position. [While they are getting settled in, I am pulling out their Composition #1 worksheet from their folders]


COMPOSITION #1:

So far this year, we've been playing lots of music that other people have composed.  Today, YOU get to be a composer.  You get to write your own music for the violin!  I'll take a volunteer to read the paragraph at the top.

[Student reads]

Thanks [name].  And we'll practice drawing the different open strings together in a moment, but first, do you see the composition that I wrote?  It's called "Falling Leaves."  I see the treble clef at the beginning, so I know it's violin music.  Next is the 4/4 time signature telling us 4 beats in a measure.  Up above I see pizz. with means...pizzicato, the Italian word telling us to pluck.  What's the first open string in my piece?  And then?

Let's play "Falling Leaves."  Playing position, left hand underneath, way up high, jawbone on chinrest.  L shape, thumb on the corner of the fingerboard, "Good Dogs Always."  Ready, play.

[If needed, may pause before m. 3 and regroup by figuring out the next open strings or go back and play the second half again]

Rest position.  Actually, leaving the sponge or shoulder rest on, gently set your instrument in its case.  In your folder you have a pencil.  Go ahead and take out the pencil, and let's go through the check list together.

First, we'll need a title.  I named my piece "Falling Leaves"; you can name your piece whatever you like.  Next, we need the name of the composer, so go ahead and write your name on the "by" line.  

We need a treble clef at the beginning so we know it's violin music--that's been done for us already!  We can check off "treble clef."

Next, we need a time signature after the treble clef so we know how many beats go in each measure.  Your choices are 3 beats or 4 beats in a measure.  I chose 4 beats in a measure for my composition, so I wrote the 4/4 time signature after the treble clef.  If you'd rather have 3 beats in a measure, write the 3/4 time signature after the treble clef.

We need bar lines between each measure--that's been done for us, so we can check off "bar lines."

Then, we need a double bar line at the very end.  That's been done for us too, so you can check that off.

For rhythms, we'll use quarter notes and quarter rests, which each count as one beat.

Then, you can use any of the open strings, G, D, A, E.

Do you see the picture of the pencil about halfway down on the paper?  That's where we're going to practice drawing the different open strings.

The G string is the lowest sounding string of the violin.  It is so low it doesn't fit on the staff, so first we are going to draw two ledger lines below the staff [I draw the two ledger lines on the board, after the treble clef that's already up there, then walk around and make sure everyone has drawn two ledger lines on theirs and that they know where on the page we are]

Next we draw the note head below the bottom ledger line.  The note head is this oval shape.  We color in the note head, then give G an up-stem, up to the right.  Go ahead and draw a couple of open Gs. [Walk around and look at papers to make sure everyone's following along]

The D string is a little higher sounding, so we'll find it a little higher on the staff, just below the staff.  Draw the note head, the oval part, just below the staff.  Color in the note head, then give D an up-stem, up to the right.

Are you ready for A?  The A string is a little higher sounding, so we draw it even higher on the staff, in the second space, between the lines.  Draw the note head between the second and third lines, on the space, and color it in.  A gets an up-stem, up to the right.

The E string is the highest sounding open string for the violin, so we'll find it way up high on the staff, on the top space.  Draw the note head for E between the top two lines, in the space, and color it in.  Now, E is a little bit different from the other open strings.  E gets a down-stem, down to the left.  [If someone asks why, I draw an E with an up-stem and show how the stem is hanging out in the white space outside of the staff and say we want the stems to mostly be in the staff area and just keep it at that]

You may want to include a rest in your composition too.  I like to draw a rest like a zig-zag or lightening bolt.  A rest counts as one beat too.

Okay, it looks like we're ready to write our first composition for the violin!  Congratulations!

[If students want to try out different sounds on their instrument to get ideas of what to write, that's fine, but I do try to keep things moving along so there's time for everything else I have planned.  I walk around and look over their shoulders and say things like "What time signature would you like?  Do you want 3 or 4 beats in a measure?  The 4/4 goes right after the treble clef.  There you go." Or "Which note would you like to start on?"  Or "Let's count how many beats we have going on in this measure.  The rest counts as one.  3/4 time signature says we have room for 3 beats in each measure and I see 5 beats, so decide which 3 you want to keep and then you can move 2 over to the next measure," etc.]

[I take a picture of one or two groups working to include in the weekly orchestra newsletter]

[As students are getting close to finishing, or in an effort to speed up their work, I'll say "Once you're done with your composition, I'll collect them so I can type them up on my computer this week so that next week you can play EVERYONE's violin composition" and possibly "I bet we can finish our compositions in the next two minutes so we can move on to the bow today."]

[If a student finishes well ahead of the others, I ask them if they want to try out their piece and see what it sounds like.  Then I collect their composition--quickly glance at it to make sure their name is on it and I can read their title--and that the title is school-appropriate--and then tell the student to take out their bow.  I work on their bow hand until another student is finished with their composition and ready to join us.]


BOWING WITH TUBES:

Go ahead and take the bow out of the case.  The first thing we do is...tighten the bow.  Righty-tighty, clockwise.  You'll notice the stick and hair are getting farther apart.  Keep tightening until you can fit about a pinkie or pencil between the stick and the hair.

Then find your bow hold.  Shake, flop, back of hand in toward nose. [I make individual corrections as quickly as I can while I am also opening their books to p. 11]

Okay, I have a present for each of you.  Don't get too excited. [Put a tube on their bow]

With the left hand, hold the tube on the left shoulder [left knee for cellos, left leg for bass].  You're going to have to hold the tube with your left hand so it stays put.  Find the bow hold, pinkie on its tip, middle fingers over frog, little space for pointer, thumb is bent. [I am modeling all of this too]

There are two directions we can pull the bow: Down and Up.  Down, up. [Students are copying my motions].  Notice the upper arm stays still.  The elbow opens and closes so we can go Down and Up.  [For cello/bass, I say "Out and In."  We call "Out" "Down" and "In" "Up."  I know we're not really going down and up, but the violins and violas do.]

The Italian word that tells us to play with the bow is arco.  Say "arco."  Then, there are symbols for down-bow and up-bow.  The symbol for the down-bow looks like a staple and tells us to pull the bow down.  The symbol for the up-bow is the V shape that tells us to pull the bow up, back towards the frog.

Let's play "Rhythm No. 1."  Do we start down-bow or up-bow?  Right, down-bow, so we need to start with our hand up by the tube, so the first direction we pull the bow is down.

[Play with CD track 13, do the repeat for each rhythm and then skip to the next rhythm.  The CD timing works out that it finishes right after the repeat of "Rhythm No. 4."]

[I take a picture of one or two groups--one violin/viola group, one cello or bass group--to include in the weekly orchestra newsletter]

Now, in "Rhythm No. 2," it told us to do "down, up, rest rest" but then there weren't any bowing markings in the second measure.  How did you all know which direction to pull the bow?  [Take some student ideas]  Well, we had just played "down, up, rest, rest"--what is our hand ready to do next, down or up?  Right, we keep going back and forth, down, then up.

Tubes can go back in the basket. [I'm bringing around the basket for tubes]  Do you think you can find a tube at home so you can practice this page 11 at home this week?

We had tightened the bow before, so now we need to...loosen.  Lefty-loosy, counter-clockwise.  You'll notice the stick and hair are getting closer together.  Keep loosening until the stick and hair are just about touching.  You might see some individual hairs start to separate.  

Holding on to the frog, gently slide the tip of the bow back in the case, then turn the knob or dial to hold the bow in place.


LEFT HAND PLAYING POSITION:

[Violin/viola only; cello/bass skip right to packing up]

Today I'm going to show you a new place for our left hand, left hand playing position.  Let's pick up our violins again and find rest position.  Now, with the left arm, do an arm swing.  On one of these swings, come all the way up to look at the palm.  Notice the wrist is naturally straight and the fingers are naturally curvy.  Let's do that again.

Now, let's go into playing position.  Left hand underneath, way up high, jawbone on chin rest.  Now, instead of making an L shape, let the right hand hang on to whatever is comfortable for you so that the left arm can do an arm swing.  [Nope, your other left.  Right hand is hanging on to the violin so left arm can swing.  It might feel kind of weird] Swing all the way up to look at the palm of the hand.  Notice wrist is straight, fingers are curvy.

At the base of our pointer finger is a knobby bone.  We're going to balance the neck of the violin on that knobby bone, thumb touches lightly across (by the red tape).  This is left-hand playing position.

[I go around adjust hands as needed]

One more thing today.  Let's bring the left elbow in towards the belly button so pinkie is over the G string.  Now, as the elbow swings out, let the pinkie drag across the strings to strum all the strings.  I'll come around and help.  After you've done it, sponge or shoulder rest comes off, time to pack up.

[I go around and help each student, then direct them to pack up]


PRACTICE ASSIGNMENT:

For practicing this week, we have p. 8 and 10 in the book again.  P. 11 is new; it's the page we did today with the bow and the tube, so you'll want to find a tube at home this week.

In the white packet, we've been playing p. 1; you're ready to play everything on p. 2.  There are harmony parts for songs like "Mary Lee" and "Ode to Joy."

On Canvas, there are bonus videos that go through everything that we did today, so if you want a refresher on how to bow with the tube or find that new left-hand playing position, click here and that will take you to the video you can watch and play along with at home.

Let's check the schedule for when I'll see you next.

Cases and folders can go back on the racks.  See you at the end of the day when you come to pick up your instrument!  Congratulations on writing your first composition today!


--


As compositions get turned in, I try to keep up each day with typing them up (and drawing two stars on each with colored pencil--one for drawing the different open strings and one for writing the composition--as well as writing any corrections or comments or "nice repeat" for those who thought to add the dots to turn the double bar line into a repeat sign).  I also scan a copy of the whole stack once finished, just for myself, and I get the composition sheets in order for the next week so it's easy to hand them back.  I also print one set of typed compositions on colored paper to tape up on the STAR Musician wall.

I also add a couple pictures to the weekly orchestra newsletter of students composing and bowing with tubes, so families get a visual too.


Go to: Lesson plan for Week 4


Monday, January 2, 2023

G Major Composition


In the spring, actually it tends to fall right around spring break, second-year orchestra students write their second composition of year, this time in the key of G Major.


G Major composition with toolbox:

sight read a number of pieces in the book in G Major and I ask a series of questions for each one: What is the first note of the piece?  (Ah, it's a note from the G Major arpeggio!)  What is the last note of the piece?  (Oh, a G, or Do?  I bet it will sound finished when we get to the end!)  Do you notice any arpeggios in this piece?  In the Orchestra Expressions book, p. 48, we play "El Charro", "El Tren", and "Happy Birthday."  Sometimes we have to play the piece a couple of times before someone spots the G, B, D or D, B, G, but students very quickly catch on that the last note will be G, Do, and can answer my question before I finish asking it by the time we get to "Happy Birthday" :)

On composing day, I'm also listening to students play their G Major scale playing checkup.

Most students don't finish during their small group that day, so I'll take a picture of compositions still in progress with my iPad (in case students forget to bring their folder the following week when it's due...then they don't have to start from scratch as they finish their composition in class).  If students do finish, I'll collect them to get a head start on typing them up/grading them.  

Students earn a grade (4/3/2/1--exceeds expectations/meets expectations/basic/does not meet expectations) on rhythm (variety of rhythms, correct number of beats per measure), music literacy (using notes from the G Major scale in a way that clearly shows that G = Do), and evaluating (including two or more of the musical tools).  I don't emphasize the graded aspect of this, but if students follow the checklist, they will be fine.

I will type these up so everyone can play their classmates' compositions and see theirs in print.  This year I am trying to save paper, so instead of printing a packet for everyone, I'll share the Google Doc link on our Canvas page for students.  Now that I have a screen/projector at both schools, I'll show the document on the screen in class, and we'll scroll through it and pick one or two to try in class.  It's a little tricky if I have students on different instruments in the same small group--I'll have two windows open, one on the top of the screen and one on the bottom and scroll through both.  Or, if it's one student on a different instrument, I might give that student my iPad and pull up their instrument's document there.  We will play one or two of these for the spring concert, so those I will print out and tape into folders (after checking with the composer to make sure it's okay with them we perform their piece).  I'll improvise a piano accompaniment too.


Template for G Major composition packet (Google Doc):


Happy composing!


--


Links to other composition worksheets: 


Monday, August 19, 2019

Concert Repertoire for Beginning Orchestra


winter concert program beginning orchestra


For winter and spring concerts at my schools, we have a combined orchestra, band, and choir concert that ideally lasts about an hour.  The orchestra portion tends to run about 25 minutes total, so a few pieces performed by the first-year orchestra, a few pieces by the second-year orchestra, and then one or two combined pieces rounds out the orchestra portion.  I meet with my students once a week for 30 minutes during recess for full orchestra and 30 minutes once a week during the school day for small group learning, so these pieces are representative of what students can comfortably have concert-ready.

Here is what my students performed last year at these concerts:


Winter Concert
Beginners:
  • Bile 'em Cabbage Down (students plucked an open string harmony part while I played the melody on the violin)
  • Slavonic Folk Song (pizz. open string harmony, then pizz. melody, then arco melody/harmony together)
  • Serenata by Dale Brubaker (all open strings, arco)

2nd Year Students:
  • Skaters' Waltz by Émile Waldteufel, arr. Richard Meyer (in preparation for the next month's district-wide String Fest)
  • Sword Dance by Thoinot Arbeau, arr. Bob Phillips

Combined Orchestras:
  • Blueberry Jam by Bonnie Greene (in preparation for the next month's district-wide String Fest)
  • Jingle Bells by James Pierpont (my arrangement)


Spring Concert
Beginners:
  • Ode to Joy (my arrangement)
  • It's the Blues Man! (from their Orchestra Expressions book, complete with student soloists improvising the rhythms during their 4-measure solo)
  • Student compositions (one four-measure composition per instrument)
  • Royal Promenade by Don Brubaker (their first "real" full orchestra piece with independent parts)

2nd Year Students:
  • Spring by Antonio Vivaldi, arr. Richard Meyer
  • Student compositions (two eight-measure compositions--one for upper strings and one for lower strings)
  • Fiddles on Fire by Mark Williams

Combined Orchestras:
  • The Lion Sleeps Tonight (arr. Bob Cerulli)


This general format has been working well--in December, I like to start with something that's pizzicato open strings to show where the beginners started at the beginning of the year (and because students would be really comfortable performing that) and work up to something that's arco with D string notes.  And the 2nd year students tend to play fewer pieces (about two big pieces alone) because theirs are longer in length.  If we do only one combined piece at the end, 2nd year students may play three pieces alone; if we do two combined pieces, 2nd year students generally play two pieces alone.

Here are some of the pieces my students have performed for past winter and spring concerts listed in no particular order (student compositions are on every concert too):

Winter Concert
Beginners:
Pizzicato open strings (one piece)
Pizzicato open strings/pizzicato D string notes/arco open string harmony plus D string melody (one piece played three times)...Or play one of these pieces pizzicato only (open string harmony/D string notes melody/choose melody or harmony third time) and play a second piece with the melody arco only
Arco open strings (one piece)

Second Year Students:
A round or something pretty simple (one or two pieces--some years I don't do one of these on the concerts and choose two full orchestra pieces instead)
Full orchestra piece (one or two pieces--often one will be performed for String Fest the following month and the other one will not)
 
Combined Pieces:
We always end with Jingle Bells!  If we do a second combined piece on this concert, it would be a String Fest piece
  • Star of the County Down (melody for 2nd year students; harmony for beginners)
  • Variations on a Sea Shanty (my arrangement)
  • Linus and Lucy by Vince Guaraldi (my arrangement that I got permission from the copyright holder to write--sorry, can't share)
  • Jingle Bells (my arrangement)
 
Spring Concert
Beginners:
Very simple full orchestra piece or a piece from the book

Piece from book with student soloists improvising their own rhythms (they play a 4-measure solo, deciding which quarter notes to change to pairs of eighth notes).  We play a total of four times--first and last times with everyone playing the melody, the second and third times with soloists to include 6 soloists total.

"Real" full orchestra piece

Second Year Orchestra:
Two or three full orchestra pieces, possibly one brought back from January's String Fest

Or something a little different

Combined Orchestras:

Concert info to share with families (Google Docs):

Please see this post for a Google Sheet of repertoire options organized by unit/concert.

For a more in-depth look at my winter concerts including logistics and sample speaking parts, please see this post :)

Which pieces do you like to program for a beginning orchestra concert?  Which pieces should I consider for future concerts?

spring concert program beginning orchestra

Monday, March 26, 2018

Books of Compositions

Book of orchestra student compositions

When my school started a section in the library dedicated to student writing, I made up two binders of student compositions from my first year of teaching up to the present.  Each time students write a new composition, I make sure to print an extra copy to add to the binder.  Now current (and future) orchestra members can check out what current (and past) students have written.

Book of orchestra student compositions


Book of orchestra student compositions


Book of orchestra student compositions

Sunday, November 26, 2017

Thankful for Composers Bulletin Board


thankful for writing bulletin board composers elementary orchestra


Right before Thanksgiving, one of my schools has a Thankful for Writing Day.  It used to be Thankful for Books Day, but with this change of focus this year, I wanted to create a connection to music with the hallway bulletin board.  Hence, a bulletin board dedicated to writers of music!

I made two quick posters: "We are thankful for writers of music :)" and "Thank you composers!" and pulled out posters I had already made of manuscripts from different composers (see this earlier blog post).  I added printouts of my students' latest compositions so they would be represented (and thanked) too!  And thanks to our general music teacher for adding compositions that her students had written as well!


thankful for writing bulletin board composers elementary orchestra


thankful for writing bulletin board composers elementary orchestra


thankful for writing bulletin board composers elementary orchestra


thankful for writing bulletin board composers elementary orchestra


thankful for writing bulletin board composers elementary orchestra